Pincha aquí
En este proyecto vas a llevar la programación un poco más lejos y crearás un pequeño videojuego donde nuestro aguerrido héroe, el famoso científico Newton, intenta no perder la oportunidad de que la manzana le caiga en la cabeza.
Vamos a crear, paso a paso, un programa en el que Newton coleccione puntos durante medio minuto, al recibir tantos manzanazos en la cabeza como sea posible.
1. Crea una manzana y un científico
Empezarás creando una manzana y un científico. Las manzanas, por ahora, serán círculos que caen del cielo, mientras que Newton será un cuadrado al fondo de la pantalla.
/*
* _03_Catch_The_Apple
*
* Create the game step-by-step, adding complexity as you move along.
* The aim is for Newton to collect points by getting bumped on the head
* by as many apples as possible in half a minute.
*
* (c) 2013-2016 Arduino LLC.
*/
void setup() {
size(400, 400); // Make the screen of an average size
}
void draw() {
ellipse(15, 15, 20, 20); // Draw the apple at the top of the screen
rect(width / 2, height - 25, 20, 20); // Draw Newton at the bottom of the screen
}
RESULTADO
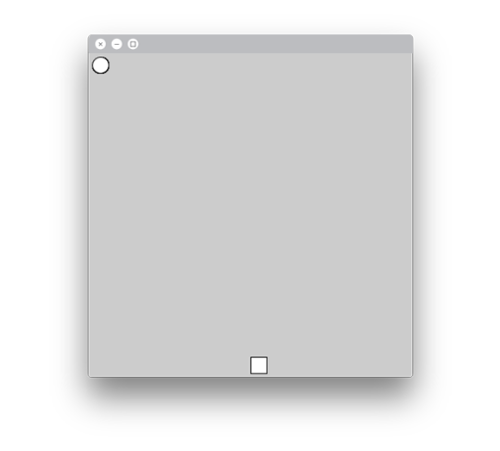
Se dibuja un circulo que representa la manzana, y un cuadrado para marcar la posición del personaje Newton.
COMANDOS
rect(x, y, rectWidth, rectHeight): Dibuja un rectángulo. x e y establecen la posición de la esquina superior izquierda, rectWidth y rectHeight establecen el tamaño en píxeles.
CÓMO FUNCIONA
En la función setup() se establece el tamaño de la ventana a 400 x 400 píxeles.
En la función draw() se dibuja un círculo en las coordenadas (15, 15), con x e y de 20 píxeles de diámetro.
Se dibuja un cuadrado en la esquina superior izquierda con las coordenadas (width/2, height-25) de 20 x 20 píxeles de tamaño.
2. Controla a Newton con el teclado
En este paso, harás que Newton (el cuadrado) se mueva a la derecha y a la izquierda con las flechas del teclado.
/*
* _03_Catch_The_Apple
*
* Create the game step-by-step, adding complexity as you move along.
* The aim is for Newton to collect points by getting bumped on the head
* by as many apples as possible in half a minute.
*
* (c) 2013-2016 Arduino LLC.
*/
int nX = 0;
void setup() {
size(400, 400); // Draw the sketch at a not-too-small size
}
void draw() {
background(200); // Clear the screen
ellipse(15, 15, 20, 20);
rect(nX, height - 25, 20, 20); // Draw Newton with a varaible X coordinate
}
void keyPressed() {
// If the right key was pressed, increase the X coordinate in 3 units
if (keyCode == RIGHT) {
nX = nX + 3;
}
// If the left key was pressed, decrease the X coordinate in 3 units
if (keyCode == LEFT) {
nX = nX - 3;
}
}
RESULTADO
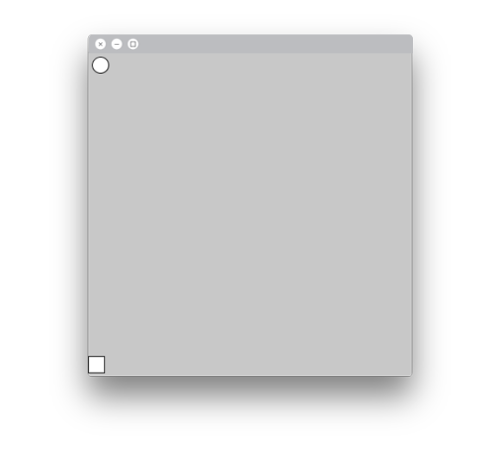
Pulsa las flechas del teclado y verás cómo se mueve el cuadrado.
COMANDOS
keyPressed(){ statements }: Esta función se llama cada vez que se pulsa una tecla. Es decir, cualquier código escrito dentro de esta función será ejecutado al pulsar una tecla.
keyCode: Es una variable interna del sistema que se emplea para detectar qué tecla ha sido pulsada.
RIGHT: Constante que contiene el valor del código de la tecla "flecha derecha".
LEFT: Constante que contiene el valor del código de la tecla "flecha izquierda".
CÓMO FUNCIONA
Se declara la variable nX, tipo int, y se inicializa a 0. Esta variable almacenará la posición X de Newton (el cuadrado).
En la función draw(), se configura el color del fondo a gris claro. Al pintar de nuevo el fondo en cada iteración de la función draw() se elimina el rastro del cuadrado cuando se mueve.
La posición X del cuadrado se fija con la variable nX. La posición Y es aún fija y vale height-25.
Se llama a la función keyPressed() cada vez que se pulsa una tecla.
Si se pulsa la tecla "fecha derecha", if( keyCode == RIGHT), se suman 3 a la variable nX. Haciendo que el cuadrado se mueva 3 píxeles a la derecha.
Si se pulsa la tecla "fecha izquierda", if( keyCode == LEFT), se restan 3 a la variable nX. Haciendo que el cuadrado se mueva 3 píxeles a la izquierda.
3. Limita los movimientos del cuadrado
En este paso, emplearás el condicional if, para limitar los movimientos de Newton en el eje X haciendo que esté siempre dentro de la ventana del programa. Es decir, tendrá que ser mayor que 0 y menor que la anchura de la ventana (width).
/*
* _03_Catch_The_Apple
*
* Create the game step-by-step, adding complexity as you move along.
* The aim is for Newton to collect points by getting bumped on the head
* by as many apples as possible in half a minute.
*
* (c) 2013-2016 Arduino LLC.
*/
int nX = 0;
void setup() {
size(400, 400);
}
void draw() {
background(200);
ellipse(15, 15, 20, 20);
rect(nX, height - 25, 20, 20);
}
void keyPressed() {
// Increment the coordinates in 3
if (keyCode == RIGHT) {
nX = nX + 3;
}
// Decrement the coordinates in 3 u
if (keyCode == LEFT) {
nX = nX - 3;
}
// Limit the valu of the X coordinate
if (nX < 0) {
nX = 0;
}
if (nX > width - 20) { // Check the size of the square on the right side
nX = width - 20;
}
}
RESULTADO
En este caso, el resultado es casi el mismo, con la excepción de que el cuadrado ya no saldrá fuera de la ventana de programa.
CÓMO FUNCIONA
Al final de la función keyPressed(), hay dos nuevas sentencias if:Si la variable nX es menor de 0, if( nX<0 ), nX se pone a 0. Haciendo así, que el cuadrado no pueda pasar el límite izquierdo.
Si la variable nX es mayor que "width - 20", if( nX>width-20 ), nX se pone a width-20. Haciendo que el cuadrado no supere el límite derecho. Se comprueba si nX es mayor que "width-20" en vez de mayor que width para asegurar que el cuadrado completo se ve, ya que su tamaño es de 20 píxeles de ancho.
4. Manzanas que caen
En este paso, modificarás el programa para hacer que la manzana (círculo) caiga de lo alto de la pantalla (cielo). Para esto, crearás una variable que almacene la coordenada Y del círculo y, la incrementarás hasta que la manzana toque el suelo, es decir, la parte baja de la ventana del programa.
/*
* _03_Catch_The_Apple
*
* Create the game step-by-step, adding complexity as you move along.
* The aim is for Newton to collect points by getting bumped on the head
* by as many apples as possible in half a minute.
*
* (c) 2013-2016 Arduino LLC.
*/
int nX = 0;
int aY = 0; // Apple's Y coordinate
void setup() {
size(400, 400);
}
void draw() {
background(200);
aY = aY + 1; // Increase apple's coordinate
if (aY > height) {
aY = 15; // If the apple touches the ground, lift it again
}
ellipse(15, aY, 20, 20); // Make the Y coordinate into a variable
rect(nX, height - 25, 20, 20);
}
void keyPressed() {
// Increase the coordinates in 3 pixels
if (keyCode == RIGHT) {
nX = nX + 3;
}
// Decrease the coordinates in 3 pixels
if (keyCode == LEFT) {
nX = nX - 3;
}
// Limit the X coordinates
if (nX < 0) {
nX = 0;
}
if (nX > width - 20) {
nX = width - 20;
}
}
RESULTADO
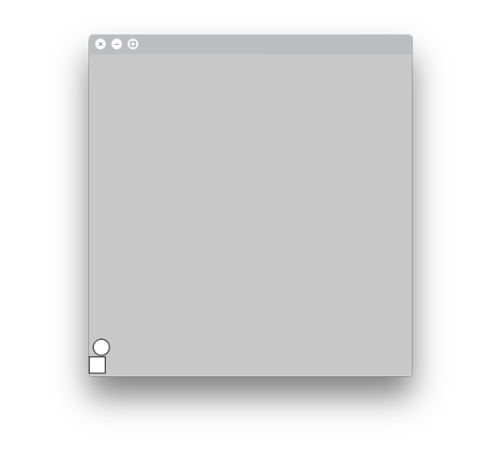
Los círculos, o las manzanas, caen del cielo.
CÓMO FUNCIONA
Se declara la variable aY, tipo int, para almacenar la posición del círculo (manzana) en el eje Y y se inicializa a 0.
Cada vez que la función draw() se ejecuta, se suma 1 a la variable aY, aY=aY+1, haciendo que el círculo esté un píxel más cerca del suelo.
Una sentencia if comprueba si la variable aY es mayor que height, if( aY>height ). Si lo es, significa que el círculo ha alcanzado la parte baja de la ventana de programa, y la variable se pone nuevo a 0.
5. Un poco de azar
Hasta ahora, las manzanas siempre salen de la misma posición en lo alto de la pantalla, esto es bastante predecible. En este paso, vas a generar un número aleatorio para cambiar la X de origen y que cada vez salgan de un sitio distinto.
/*
* _03_Catch_The_Apple
*
* Create the game step-by-step, adding complexity as you move along.
* The aim is for Newton to collect points by getting bumped on the head
* by as many apples as possible in half a minute.
*
* (c) 2013-2016 Arduino LLC.
*/
int nX = 0;
int aY = 0;
int aX = 15; // Apple's X coordinate
void setup() {
size(400, 400);
}
void draw() {
background(200);
aY = aY + 1;
if (aY > height) {
aY = 15;
aX = int(random(width - 20)); // Initialize the X coordinate of the apple to a random number
}
ellipse(aX, aY, 20, 20); // Include the changes to the X coordinate to the circle's movement
rect(nX, height - 25, 20, 20);
}
void keyPressed() {
// Increase the coordinates in 3 pixels
if (keyCode == RIGHT) {
nX = nX + 3;
}
// Decrease the coordinates in 3 pixels
if (keyCode == LEFT) {
nX = nX - 3;
}
// Limit the X coordinates
if (nX < 0) {
nX = 0;
}
if (nX > width - 20) {
nX = width - 20;
}
}
RESULTADO
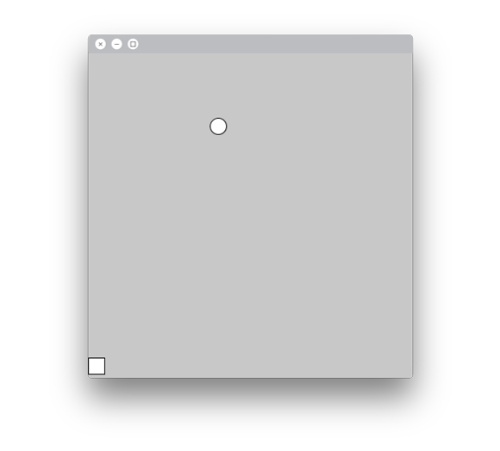
Con este cambio en el programa, podrás ver que las manzanas salen desde cualquier punto en lo alto de la pantalla.
COMANDOS
random(max): Genera un número aleatorio entre 0 y max-1. También puedes usar random(min,max) para generar un número aleatorio entre min y max-1.
CÓMO FUNCIONA
Se declara aX, una variable tipo int, para almacenar el valor de la posición X de los circulos (manzanas) y se inicializa a 15. Ten en cuenta que la coordenada habrá que cambiarla solo cuando la manzana llegue al suelo, si no cambiará aleatoriamente durante su caída.
Cuando el círculo alcanza la parte baja de la ventana (suelo), if( aY>height), se fija una nueva coordenada X. Un número aleatorio entre 0 y width-20, aX = int( random( width-20 ) ).
Se dibuja el círculo utilizando aX cómo coordenada X, ellipse( aX, aY, 20, 20).
6. Detección de colisión
La acción de detectar que dos objetos se chocan en la pantalla se llama detección de colisión. En este paso, vas a detectar si la manzana choca con la cabeza de Newton empleando una sentencia if. Al detectar colisión, se cambia el color del cuadrado y del círculo a rojo.
/*
* _03_Catch_The_Apple
*
* Create the game step-by-step, adding complexity as you move along.
* The aim is for Newton to collect points by getting bumped on the head
* by as many apples as possible in half a minute.
*
* (c) 2013-2016 Arduino LLC.
*/
int nX = 0;
int nY = 0; // Y coordinate for the square
int aY = 0;
int aX = 15;
void setup() {
size(400, 400);
nY = height - 25; // Init the coordinate Y for the square to be at the end of the screen
}
void draw() {
background(200);
aY = aY + 1;
if (aY > height) {
aY = 15;
aX = int(random(width - 20));
}
fill(255); // By default fill in the shapes white
// Collision detection
if (aY + 10 > nY && aY - 10 < nY + 20) { // Is the circle at the same height as the square?
if (aX + 10 > nX && aX - 10 < nX + 20) { // Is the circle on top of the square?
fill(255, 0, 0); // Change the filling color to red
}
}
// Lines to understand collision detection
// uncomment them to test how things work
//line(0,aY-10,width,aY-10);
//line(aX-10,0,aX-10,height);
//line(0,aY+10,width,aY+10);
//line(aX+10,0,aX+10,height);
ellipse(aX, aY, 20, 20);
rect(nX, nY, 20, 20); // Include a variable to control the Y coordinate
}
void keyPressed() {
// Increase the coordinates in 3 pixels
if (keyCode == RIGHT) {
nX = nX + 3;
}
// Decrease the coordinates in 3 pixels
if (keyCode == LEFT) {
nX = nX - 3;
}
// Limit the X coordinates
if (nX < 0) {
nX = 0;
}
if (nX > width - 20) {
nX = width - 20;
}
}
RESULTADO
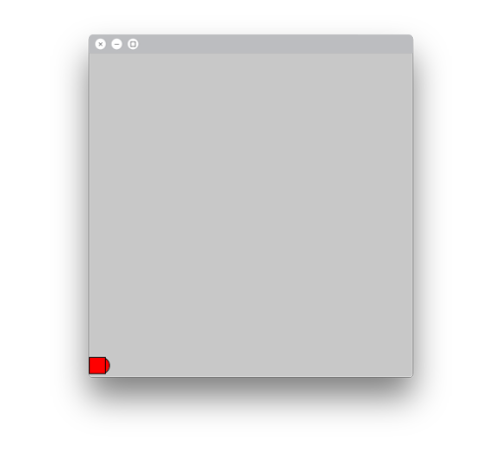
Cuando las manzanas (círculos) colisionan con el cuadrado (Newton) ambos se vuelven rojos.
COMANDOS
if(test1 && test2){ statements }: Esto se utiliza para realizar varias comprobaciones en un único if(). En este ejemplo, comprobamos si aY+10 > nY y si aY-10 < nY+20. Si estas dos comprobaciones son ciertas simultáneamente, se ejecuta el código entre llaves.
CÓMO FUNCIONA
Se declara la variable nY, tipo int, para almacenar la coordenada Y de la posición del cuadrado (Newton) y se inicializa a 0. Esta variable facilita la comprobación de las colisiones.
En la función setup(), se asigna a la variable nY el valor width-20. Esto se tiene que hacer en la función setup() después de ajustar el tamaño de la ventana. En caso contrario, width no tomará el valor correcto.
El color de relleno se fija a blanco, fill(255), así se puede cambiar cuando se detecta una colisión.
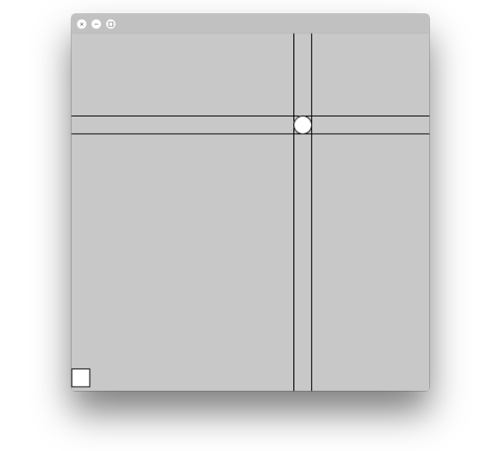
La detección de colisión se realiza con dos sentencias if, una dentro de otra:La primera, comprueba si el circulo se encuentra a la misma altura que el cuadrado, if( aY+10 > nY && aY-10 < nY+20). Es decir, si la zona inferior del círculo (aY+10) está por debajo de la superior del cuadrado (nY), y la superior del círculo (aY-10) está por encima de la inferior del cuadrado (nY+20). Si esta condición es cierta, se comprueba la segunda.
La segunda, comprueba si el círculo se encuentra en la misma posición X que el cuadrado.
Además, si activas las siguientes líneas en el programa. Verás una serie de líneas en la pantalla enmarcando el movimiento de los objetos. Puedes emplearlas para ver cómo funciona la detección de colisión.
// lines of code to understand how collision works
// erase the comment in order to see the code
line(0,aY-10,width,aY-10);
line(aX-10,0,aX-10,height);
line(0,aY+10,width,aY+10);
line(aX+10,0,aX+10,height);
7. Más rápido
Para hacer el juego más interesante, en este paso harás que las manzanas caigan más rápido.
/*
* _03_Catch_The_Apple
*
* Create the game step-by-step, adding complexity as you move along.
* The aim is for Newton to collect points by getting bumped on the head
* by as many apples as possible in half a minute.
*
* (c) 2013-2016 Arduino LLC.
*/
int nX = 0;
int nY = 0;
float aY = 0; // Make aY into a float
int aX = 15;
float aV = 3; // Apple's falling speed
void setup() {
size(400, 400);
nY = height - 25;
}
void draw() {
background(200);
// Apple's movement
aY = aY + aV; // Introduce the speed as an increment
if (aY > height) {
aY = 15;
aX = int(random(width - 20));
}
fill(255);
// Collision detection
if (aY + 10 > nY && aY - 10 < nY + 20) {
if (aX + 10 > nX && aX - 10 < nX + 20) {
fill(255, 0, 0);
}
}
ellipse(aX, aY, 20, 20);
rect(nX, nY, 20, 20);
}
void keyPressed() {
// Increase the coordinates in 3 pixels
if (keyCode == RIGHT) {
nX = nX + 3;
}
// Decrease the coordinates in 3 pixels
if (keyCode == LEFT) {
nX = nX - 3;
}
// Limit the X coordinates
if (nX < 0) {
nX = 0;
}
if (nX > width - 20) {
nX = width - 20;
}
}
RESULTADO
Las manzanas caen más rápido.
CÓMO FUNCIONA
Para preparar el siguiente paso, la variable aY se hace de tipo float en lugar de tipo int
Se declara la variable aV, tipo float, para almacenar el valor 3. Esto es la velocidad de la manzana.
En la función draw(), la posición Y de la manzana, se fija incrementando la variable aY con la velocidad, aV.
8. A Newton le gusta la gravedad, dale más
En este paso, modificarás la caída de las manzanas para que responda a la aceleración de la gravedad. De este modo, las manzanas irán cada vez más rápido cuanto más cerca estén del suelo.
/*
* _03_Catch_The_Apple
*
* Create the game step-by-step, adding complexity as you move along.
* The aim is for Newton to collect points by getting bumped on the head
* by as many apples as possible in half a minute.
*
* (c) 2013-2016 Arduino LLC.
*/
int nX = 0;
int nY = 0;
float aY = 0;
int aX = 15;
float aV = 0; // Apple's initial speed is zero
float aA = 0.05; // Apple's intial accerlation (0.98 would be too much)
void setup() {
size(400, 400);
nY = height - 25;
}
void draw() {
background(200);
// Apple's movement
aV = aV + aA; // EstiaAte the speed according to the acceleration
aY = aY + aV; // EstiaAte the position according to the speed
if (aY > height) {
aY = 15;
aX = int(random(width - 20));
aV = 0; // Apples start falling at zero speed
}
fill(255);
// Collision detection
if (aY + 10 > nY && aY - 10 < nY + 20) {
if (aX + 10 > nX && aX - 10 < nX + 20) {
fill(255, 0, 0);
}
}
ellipse(aX, aY, 20, 20);
rect(nX, nY, 20, 20);
}
void keyPressed() {
// Increase the coordinates in 3 pixels
if (keyCode == RIGHT) {
nX = nX + 3;
}
// Decrease the coordinates in 3 pixels
if (keyCode == LEFT) {
nX = nX - 3;
}
// Limit the X coordinates
if (nX < 0) {
nX = 0;
}
if (nX > width - 20) {
nX = width - 20;
}
}
RESULTADO
Las manzanas caen dependiendo de la aceleración y la gravedad.
CÓMO FUNCIONA
Cuando se declara la variable de la velocidad, aV, se le asigna el valor 0.
Se declara una variable, aA, tipo float, para almacenar un valor de aceleración de 0.05 (en el mundo real esto es 0.98, pero poner ese valor haría muy difícil el juego.)
En la función draw(), la velocidad de la manzana se configura incrementando aV con aA. Esto aumenta la velocidad cada vez que la función draw() se ejecuta.
La posición Y de la manzana, se fija incrementando la variable aY con aV. Esto hace que la manzana se mueva distancias más grandes cada vez que la función draw() se ejecuta.
Cuando se lanza una nueva manzana, esto se hace en la sentencia if donde se comprueba si la variable aY es mayor que height, la velocidad se fija 0.
9. Cuenta los puntos
En este paso, implementarás un contador que cuente cuántas manzanas golpearon a Newton.
Nota: como empiezas a tener muchas variables en tu programa, es recomendable añadir comentarios para recordar qué hace cada una.
/*
* _03_Catch_The_Apple
*
* Create the game step-by-step, adding complexity as you move along.
* The aim is for Newton to collect points by getting bumped on the head
* by as many apples as possible in half a minute.
*
* (c) 2013-2016 Arduino LLC.
*/
int nX = 0; // X coordinate, Newton
int nY = 0; // Y coordinate, Newton
float aY = 0; // Y coordinate, apples
int aX = 15; // X coordinate, apples
float aV = 0; // Y speed, apples
float aA = 0.05; // Y acceleration, apples
int p = 0; // Points
void setup() {
size(400, 400);
nY = height - 25;
}
void draw() {
background(200);
// Apple's movement
aV = aV + aA;
aY = aY + aV;
if (aY > height) {
aY = 15;
aX = int(random(width - 20));
aV = 0;
}
fill(255);
// Collision detection
if (aY + 10 > nY && aY - 10 < nY + 20) {
if (aX + 10 > nX && aX - 10 < nX + 20) {
fill(255, 0, 0);
// If collision increase the points
p = p + 1;
}
}
ellipse(aX, aY, 20, 20);
rect(nX, nY, 20, 20);
// Show the points on the screen
fill(0);
text("Hits: " + p, 3 * width / 4, 20); // Text to the right on the screen
}
void keyPressed() {
// Increase the coordinates in 3 pixels
if (keyCode == RIGHT) {
nX = nX + 3;
}
// Decrease the coordinates in 3 pixels
if (keyCode == LEFT) {
nX = nX - 3;
}
// Limit the X coordinates
if (nX < 0) {
nX = 0;
}
if (nX > width - 20) {
nX = width - 20;
}
}
RESULTADO
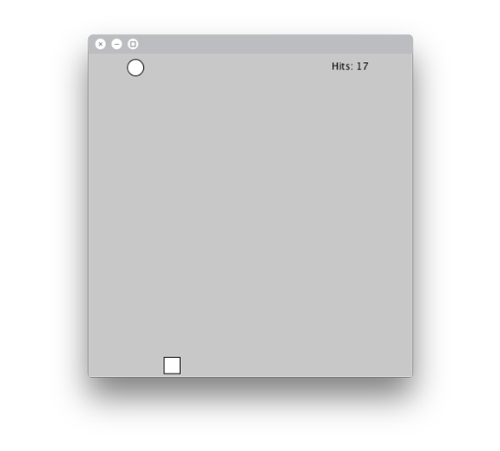
La cantidad de manzanas que golpeen la cabeza de Newton se contarán y se mostrarán en la ventana del programa.
COMANDOS
text( text, x, y ): escribe un texto (text) en la pantalla en las coordenadas x e y.
CÓMO FUNCIONA
Se declara la variable, p, tipo int para almacenar los puntos.
En la sentencia if para la detección de colisión, una vez que el color de relleno se fija a rojo, la variable p se incrementa en 1.
En las últimas líneas de la función draw(), se fija el color de relleno a negro.
Se sitúa un texto en las coordenadas ( 3\*width/4, 20). El texto dice “Hits:“ y el valor de la variable p. Ten en cuenta que "hits" es "golpes" en español.
10. Uoops, error
Te habrás dado cuenta que tu programa ahora mismo está contabilizando puntos de más. Cada vez que la manzana cae sobre la cabeza de Newton, cuando el círculo toca el cuadrado, tu contador sube más o menos 5 puntos. Esto se debe a que el contador continúa contando hasta que la mazana se solapa con Newton por completo.
Para corregir esto, crearás una variable de tipo boolean (una variable que puede ser verdadero (true) o falso (false)) para decirle al programa si contar puntos o no.
/*
* _03_Catch_The_Apple
*
* Create the game step-by-step, adding complexity as you move along.
* The aim is for Newton to collect points by getting bumped on the head
* by as many apples as possible in half a minute.
*
* (c) 2013-2016 Arduino LLC.
*/
int nX = 0; // X coordinate, Newton
int nY = 0; // Y coordinate, Newton
float aY = 0; // Y coordinate, apples
int aX = 15; // X coordinate, apples
float aV = 0; // Y speed, apples
float aA = 0.05; // Y acceleration, apples
int p = 0; // Points
boolean pCount = true; // Check whether to count points or not
void setup() {
size(400, 400);
nY = height - 25;
}
void draw() {
background(200);
// Apple's movement
aV = aV + aA;
aY = aY + aV;
if (aY > height) {
aY = 15;
aX = int(random(width - 20));
aV = 0;
// When throwing a new apple it will be possible
// to start counting points again
pCount = true;
}
fill(255);
// Collision detection
if (aY + 10 > nY && aY - 10 < nY + 20) {
if (aX + 10 > nX && aX - 10 < nX + 20) {
fill(255, 0, 0);
// If collision increase the points
if (pCount) p = p + 1;
pCount = false; // Whenever you make it at this point, do not
// count any more points
}
}
ellipse(aX, aY, 20, 20);
rect(nX, nY, 20, 20);
// Show the points on the screen
fill(0); // Text color
text("Hits: " + p, 3 * width / 4, 20); // Text alligned to the right
}
void keyPressed() {
// Increase the coordinates in 3 pixels
if (keyCode == RIGHT) {
nX = nX + 3;
}
// Decrease the coordinates in 3 pixels
if (keyCode == LEFT) {
nX = nX - 3;
}
// Limit the X coordinates
if (nX < 0) {
nX = 0;
}
if (nX > width - 20) {
nX = width - 20;
}
}
RESULTADO
El contador ha cambiado, ahora solo cuenta una colisión cada vez.
COMANDOS
if( boolean ){ statements }: Comprueba si una variable tipo boolean es true, si lo es ejecuta el código entre llaves statements. Puedes también comprobar si es false escribiendo if( !boolean ).
CÓMO FUNCIONA
Se declara la variable pCount, tipo boolean. Los puntos solo se cuentan cuando esta variable es true.
Justo después de fijar la velocidad a 0, en la sentencia if que comprueba si la variable aY es mayor que height, la variable pCount se pone a true.
Cuando se detecta una colisión, se incrementa en 1 la variable p, siempre y cuando pCount valga true.
A continuación, pCount se pone a false.
Cuando se lanza una nueva manzana, la variable pCount se pone de nuevo a true.
11. Y el tiempo empieza
El objetivo del juego es recibir tantas manzanas en la cabeza de Newton como sea posible en medio minuto. En este paso, crearás un temporizador de cuenta atrás y lo mostrarás en la ventana del programa.
/*
* _03_Catch_The_Apple
*
* Create the game step-by-step, adding complexity as you move along.
* The aim is for Newton to collect points by getting bumped on the head
* by as many apples as possible in half a minute.
*
* (c) 2013-2016 Arduino LLC.
*/
int nX = 0; // X coordinate, Newton
int nY = 0; // Y coordinate, Newton
float aY = 0; // Y coordinate, apples
int aX = 15; // X coordinate, apples
float aV = 0; // Y speed, apples
float aA = 0.05; // Y acceleration, apples
int p = 0; // Points
boolean pCount = true; // Check whether to count points or not
long t = 0; // Store the time
void setup() {
size(400, 400);
nY = height - 25;
t = millis(); // Initialize the time counter
}
void draw() {
background(200);
// Apple's movement
aV = aV + aA;
aY = aY + aV;
if (aY > height) {
aY = 15;
aX = int(random(width - 20));
aV = 0;
// When throwing a new apple it will be possible
// to start counting points again
pCount = true;
}
fill(255);
// Collision detection
if (aY + 10 > nY && aY - 10 < nY + 20) {
if (aX + 10 > nX && aX - 10 < nX + 20) {
fill(255, 0, 0);
// If collision increase the points
if (pCount) p = p + 1;
pCount = false; // Whenever you make it at this point, do not
// count any more points
}
}
ellipse(aX, aY, 20, 20);
rect(nX, nY, 20, 20);
// Count the time
float timer = (millis() - t) / 1000; // Count how much time has passed in seconds
// GAME OVER
if (timer >= 30) { // If time reaches 30 seconds, end the game
noLoop();
}
// Show the time on the screen
fill(0);
text("Time: " + (30 - timer), 10, 20);
// Show the points on the screen
fill(0);
text("Hits: " + p, 3 * width / 4, 20);
}
void keyPressed() {
// Increase the coordinates in 3 pixels
if (keyCode == RIGHT) {
nX = nX + 3;
}
// Decrease the coordinates in 3 pixels
if (keyCode == LEFT) {
nX = nX - 3;
}
// Limit the X coordinates
if (nX < 0) {
nX = 0;
}
if (nX > width - 20) {
nX = width - 20;
}
}
RESULTADO
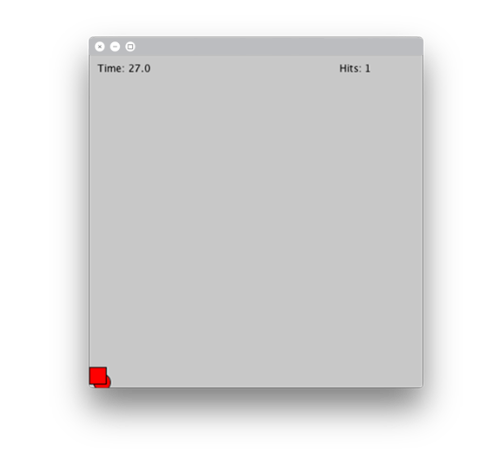
Verás el temporizador en la ventana del programa.
COMANDOS
long: Este es un tipo de datos para números enteros muy grandes. Es conveniente usarlos cuando manejamos variables temporales, porque estos datos pueden ser muy grandes. ¿Recuerdas que una variables es cómo un contenedor de datos? Bien, se puede decir que long es un contenedor más grande que int. Un int se queda sin espacio antes que un long.
noLoop(): Detiene la ejecución continua de la función draw. Para volver a ejecutar el programa tendrás que llamar a loop().
millis(): Esta función devuelve el tiempo en milisegundos que ha pasado desde la última vez que se llamó. Si es la primera vez que la llamas, entonces desde que comenzó el programa.
CÓMO FUNCIONA
Se declara la variable, t, tipo long para almacenar el tiempo.
En la función setup(), se asigna a la variable t el valor que devuelve millis(). Como el valor a t se asigna al final de setup(), este valor será próximo a 0, pero aún más próximo a cuando el juego comienza realmente.
En la función draw(), una vez dibujados el cuadrado y el círculo, se declara la variable timer tipo float.
Se asigna a timer el valor (millis()-t) / 1000. Al dividirlo entre 1000, esta variable tendrá un valor en segundos en lugar de en milisegundos.
Si la variable timer es igual o mayor que 30, han pasado 30 segundos y entonces se llama a la función noLoop() la cual detendrá el programa.
Se muestra un texto en las coordenadas (10, 20). El texto dice: “Time:“ y el valor 30 - t. Es decir, se muestra la cuenta atrás. Ten en cuenta que "time" es "tiempo" en español.
12. Añade imágenes al juego
En el último paso, añadirás imágenes (tipo PNG) para el fondo las manzanas y Newton. Las puedes crear tú, o buscarlas en Internet.
Nota: Es importante que las imágenes sean de tipo PNG si quieres que haya transparencia entre las imágenes y el fondo. Ten en cuenta que, al cambiar las formas por imágenes, las proporciones también cambian, por lo que tendrás que hacer encajar esos valores en la parte del programa dedicado a la detección de colisiones.
/*
* _03_Catch_The_Apple
*
* Create the game step-by-step, adding complexity as you move along.
* The aim is for Newton to collect points by getting bumped on the head
* by as many apples as possible in half a minute.
*
* (c) 2013-2016 Arduino LLC.
*/
String[] imFiles = {"fondo.png", "manzana.png", "newton1.png", "newton2.png"};
PImage[] im = new PImage[4];
int nX = 0; // X coordinate, Newton
int nY = 0; // Y coordinate, Newton
float aY = 0; // Y coordinate, apples
int aX = 15; // X coordinate, apples
float aV = 0; // Y speed, apples
float aA = 0.05; // Y acceleration, apples
int p = 0; // Points
boolean pCount = true; // Check whether to count points or not
long t = 0; // Store the time
void setup() {
size(400, 400);
nY = height - 135;
t = millis();
// Load the images
for(int i = 0; i < 4; i = i + 1) {
im[i] = loadImage(imFiles[i]);
}
}
void draw() {
background(200);
image(im[0], 0, 0, width, height); // Background image
// Apple's movement
aV = aV + aA;
aY = aY + aV;
if (aY > height) {
aY = 15;
aX = int(random(width - 20));
aV = 0;
// When throwing a new apple it will be possible
// to start counting points again
pCount = true;
}
fill(255);
// Collision detection
if (aY + 50 > nY && aY < nY + 135) {
if (aX + 40 > nX && aX < nX + 128) {
fill(255, 0, 0);
// If collision increase the points
if (pCount) p = p + 1;
pCount = false; // Whenever you make it at this point, do not
// count any more points
}
}
image(im[1], aX, aY); // Apple
if(pCount) {
image(im[2], nX, nY); // Newton looking for apples
} else {
image(im[3], nX, nY); // Newton got an apple
}
// Count the time
float timer = (millis() - t) / 1000; // Count how much time has passed in seconds
// GAME OVER
if (timer >= 30) { // If time reaches 30 seconds, end the game
noLoop();
}
// Show the time on the screen
fill(0);
textSize(20); // Increase the font size
text("Time: " + (30 - timer), 10, 20);
// Show the points on the screen
fill(0);
textSize(20); // Increase the font size
text("Hits: " + p, 3 * width / 4, 20);
}
void keyPressed() {
// Increase the coordinates in 3 pixels
if (keyCode == RIGHT) {
nX = nX + 3;
}
// Decrease the coordinates in 3 pixels
if (keyCode == LEFT) {
nX = nX - 3;
}
// Limit the X coordinates
if (nX < 0) {
nX = 0;
}
if (nX > width - 20) {
nX = width - 20;
}
}
RESULTADO
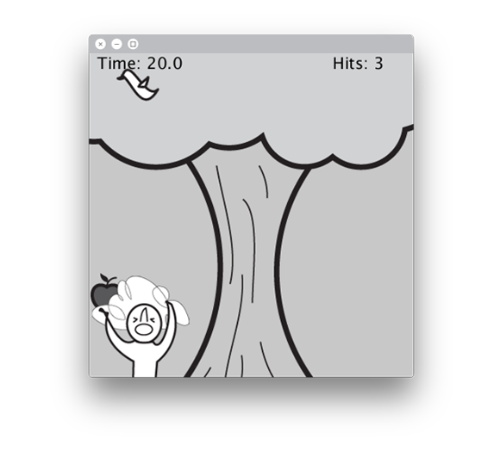
Como ves, ahora los círculo son manzanas, el cuadrado es Newton, y en el fondo hay un árbol.
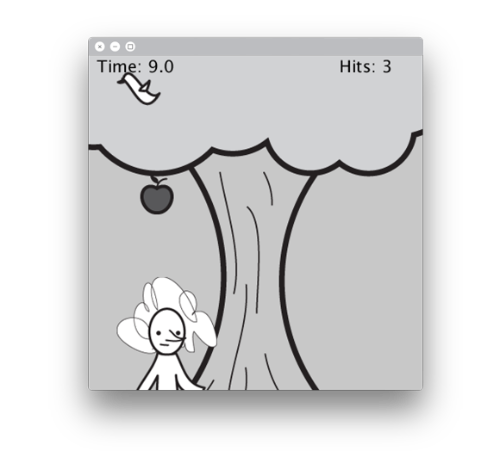
Para cargar las imágenes utilizamos el mismo método que en los proyectos anteriores, utilizando arrays. En lugar de cambiar el color de las formas cuando una colisión sea detectada, utilizamos el boolean pCount para decidir qué imagen de Newton mostrar.
CÓMO FUNCIONA
Se declara el array imFiles\[\], tipo String, para almacenar los nombres de los archivos de las imagenes que se van a utilizar.
Se declara el array im\[\], tipo tipo PImage, para almacenar las imágenes que se van a utilizar.
En la función setup(), se utiliza un bucle for para recorrer los nombres de los archivos de las imágenes del array imFiles\[\], y cargar las mismas en el array im\[\].
im\[0\] contiene la imagen de fondo y se mostrará ajustada al tamaño de la ventana, esto se hace al empezar la función draw().
im\[1\] contiene la imagen de la manzana y se mostrará después de la detección de colisión.
im\[2\] y im\[3\] contienen las imágenes de Newton, la primera es Newton normal y la segunda es Newton después de ser golpeado en la cabeza. La variable pCount, tipo boolean se utiliza para decidir qué imagen se mostrará.
Si pCount es true, significa que el programa está listo para contar los puntos si una colisión es detectada, y se muestra la imagen de Newton normal,(im\[2\]).
Si pCount no es true, significa que se detecta una colisión y que suma un punto, entonces se muestra la imagen de Newton golpeado (im\[3\]).
En las sentencias if que comprueban la colisión, los valores se han modificado para encajar los tamaños en las imágenes en vez de las formas utilizadas anteriormente.
¡SIGUE EXPERIMENTANDO!
Para mejorar este juego puedes hacer varias cosas:
Imágenes personalizadas: Crea tus propias imágenes.
Pantalla de inicio: Crea una pantalla de inicio y que se pase al juego una vez se presione un botón.
Pantalla final: Crea una pantalla que muestre el resultado una vez se haya terminado el tiempo.
Reinicio: Haz posible reiniciar el juego cuando el tiempo haya terminado. No te olvides de reiniciar todas las variables necesarias.
Modifica los movimientos: Haz que la manzana se mueva modificando la aceleración en lugar de la velocidad.




 COMANDOS

 CÓMO FUNCIONA
 1. Añadir imágenes
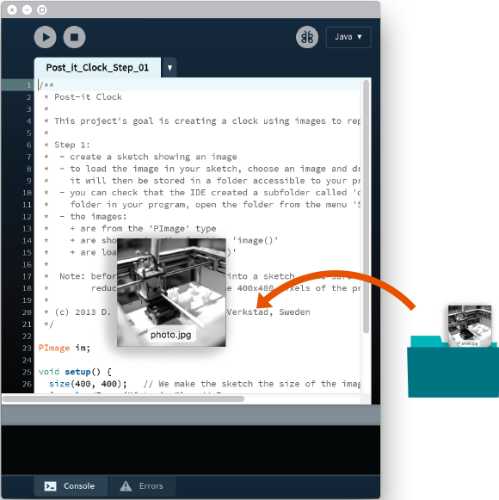 La imagen se almacena en una subcarpeta del programa llamada data. Esta captura de pantalla muestra la estructura de los ficheros donde puedes encontrar el archivo de la imagen. También puedes encontrarlo abriendo la carpeta desde el menú 'Sketch>Mostrar carpeta del Sketch'.
